How to find your Zoom cloud recordings
Our BC Zoom accounts are directly connected to our Panopto environment. Unless you’ve configured your Zoom meeting to automatically upload to a specific Panopto folder, when you record to the cloud in Zoom they will automatically be uploaded to your personal folder in Panopto. This guide covers how to find those recordings and (optionally) how to move them to another Panopto folder of your choosing. If you would simply like to share your recording with a wider audience rather than move it to a different location you can find out more information about sharing Panopto recordings with others here.
This guide assumes that you know how to log in to Canvas and access your Canvas courses.
Locating your Zoom cloud recording in Panopto
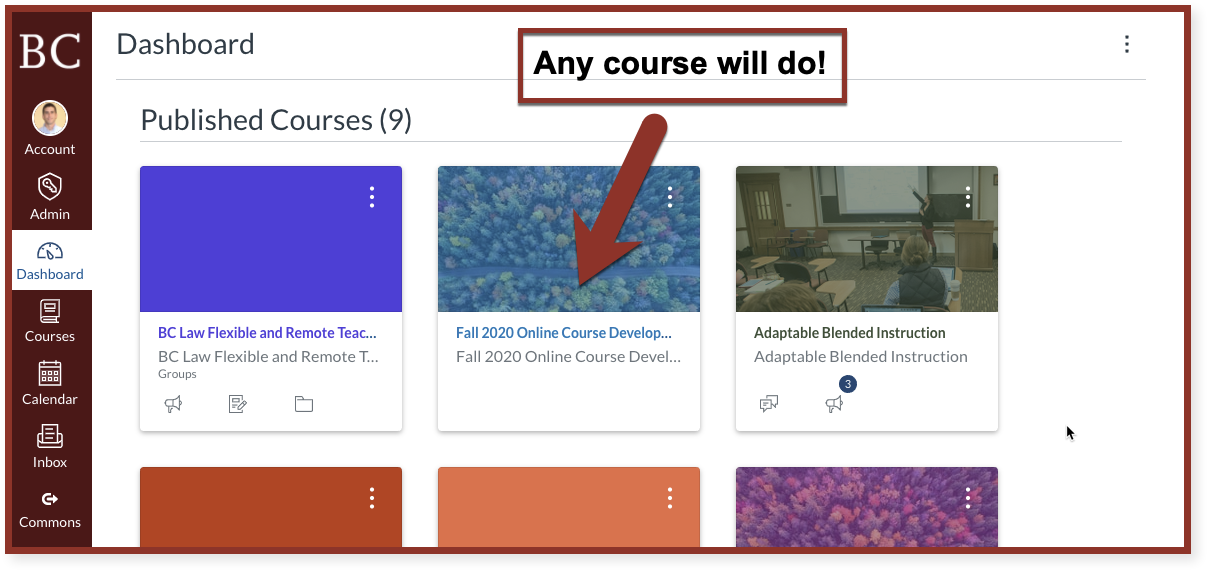
- Log into Canvas (bc.edu/lms) with your BC primary credentials
- Click on any of your courses on your Canvas dashboard. (At this point it’s not important which course you click on. This is simply a means to navigate to Panopto)
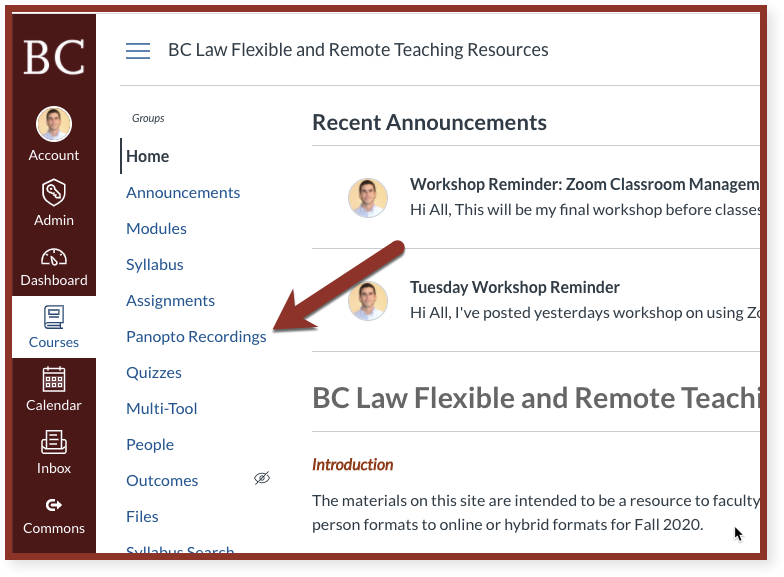
- Once on your course home page, find and click on the Panopto Recordings link in your course navigation.
- It may not appear in the same location as seen in the image below. If for some reason you don’t see it in your course navigation you can follow these instructions to enable Panopto Recordings in your course navigation.
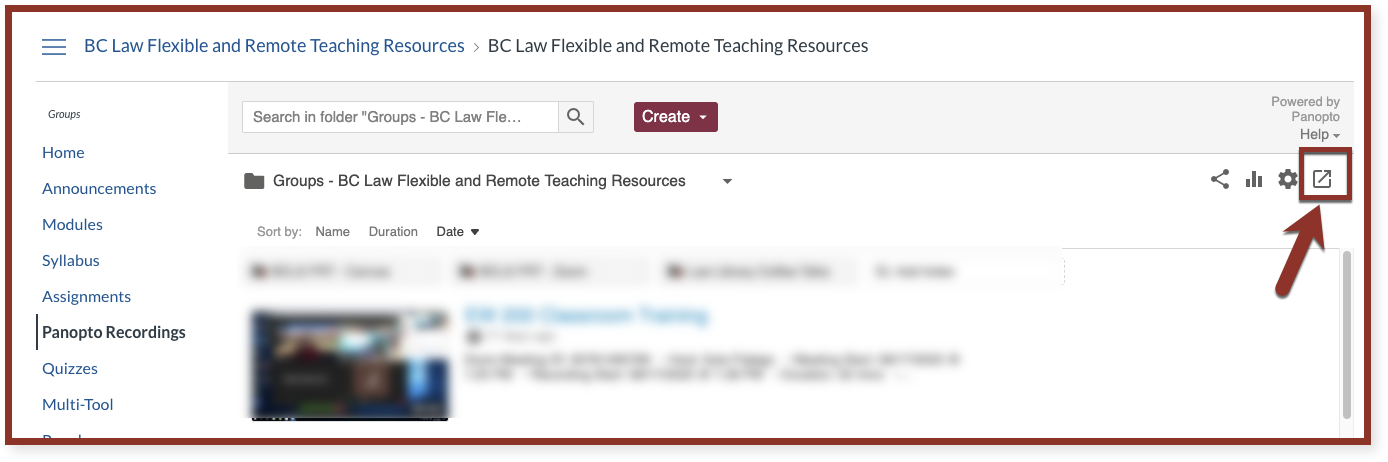
- Once the Panopto screen loads, click the icon in the upper right corner to open Panopto in a new window.
- Once the Panopto website loads, click the “My Folder” link in your course navigation.
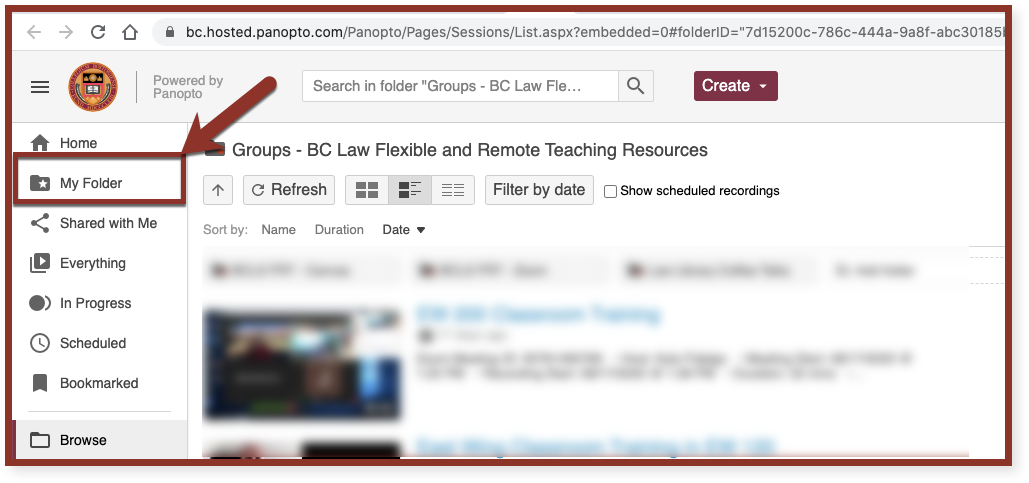
- By default, all Zoom cloud recordings not associated with a specific folder get saved to a sub folder titled “Meeting Recordings”. Click that folder to view your Zoom cloud recording files.
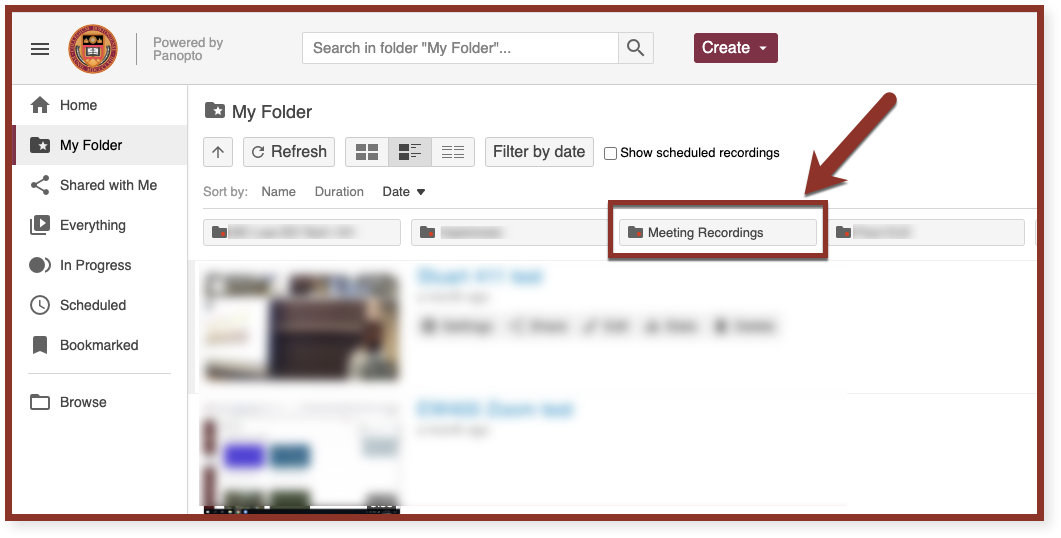
- The videos in this folder can now be shared or moved to another Panopto folder if you’d like.
Sharing Panopto Recordings
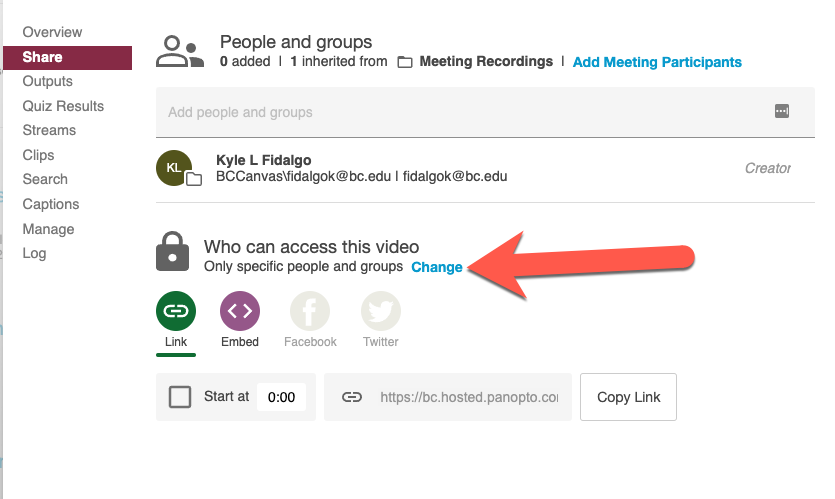
- Hover your mouse over the video you’d like to move and click the “Settings” button.
- In the window which opens, click Share in the left menu.
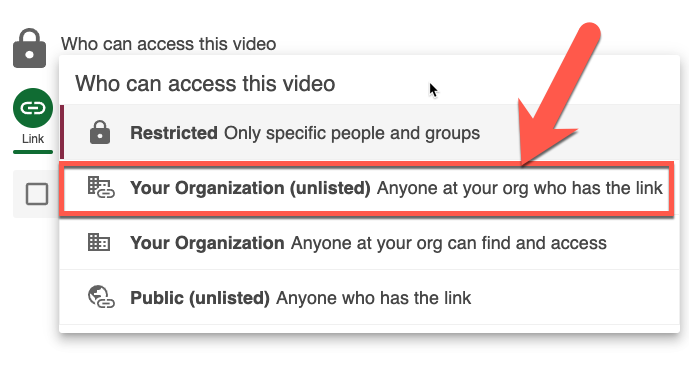
- Click the “Change” link (a) to change viewer access at the link level. In the menu that opens, select “Your organization (unlisted)” (b).
- Click the “Copy Link” button to copy the link to your clipboard. You can now paste the link to the recording into an email to whoever you’d like to share the video with.
Moving Panopto Recordings To Another Panopto Folder
- Hover your mouse over the video you’d like to move and click the “Settings” button.
- Click the “Edit” link next to the folder name.

- This will convert the title of the folder to a drop-down menu that will allow you to search for additional folders you have access to. Click anywhere in the drop down to search for a new folder location
- You can also type in the drop-down menu to speed up your search.
- Use the text box to start typing the folder name you’d like to move the recording to. HINT: If you are moving your recording to a Canvas course folder you can start by typing the semester i.e. Fall 2020 or the course code i.e. LAWSXXXX (replace the “X” with the actual course code).
- Once you see the folder appear in the list click it to select it.
- After selecting the folder, click the “Save” link to keep your changes.
- Your recording will now be available in the folder you chose.
In this post: